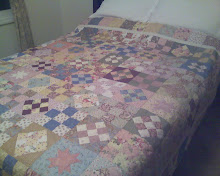
I devoted the summer of 2007 to making my own sewing space and took pictures to record the event. The room was my son's bedroom, but it was evident that he truly was grown and gone on his own and that saving his stuff was unnecessary. Also, we had begun that terrible habit of putting stuff we didn't exactly know what to do with in his room! To say that it had become a major junk room would be putting it very mildly!! So, with Kevin's much needed help, we cleared the room. He painted the walls and steam-vacced the carpet. I made some very pretty curtains and arranged a workspace that has served me quite well over the last year. See for yourself in these pictures I took when the room was spanking new and clean. (I hate to say that it's a bit cluttered at the moment!)


A month or so after taking these pictures, I added a design wall, which is in use below. I bought 2 large pieces of wall insulation and used duct tape to hold them together. Then I took lengths of batting to cover it entirely, then covered the batting with white flannel. I used straight pins to secure the batting and flannel to the insulation, pulling them around behind to hide. Figuring out how to attach it to the wall was initially a challenge, but we (Kevin and I) eventually just pounded about 4 nails into the wall and pushed the insulation foam wall onto the nails. The nails were the kind with very little "head," so they pushed right through the insulation.. It's been up a year, and I've had no trouble with it. The picture of my glass-front cabinet is in the guest room, not my sewing room, but it shows where I have stored/displayed some of my creations.


